Preparation
How to download raw data and preparation before starting data reduction are described below.
Downloading HSC raw data
Warning
Please read BIAS, DARK and FLAT data before you download calibration data for your run.
You can download your observed data via STARS (Subaru Telescope Archive System) .
After login to STARS, you can see the page like figure 1. From Search by tab, choose Proposal_ID Instrument and Proposal_ID, then select your proposal ID.
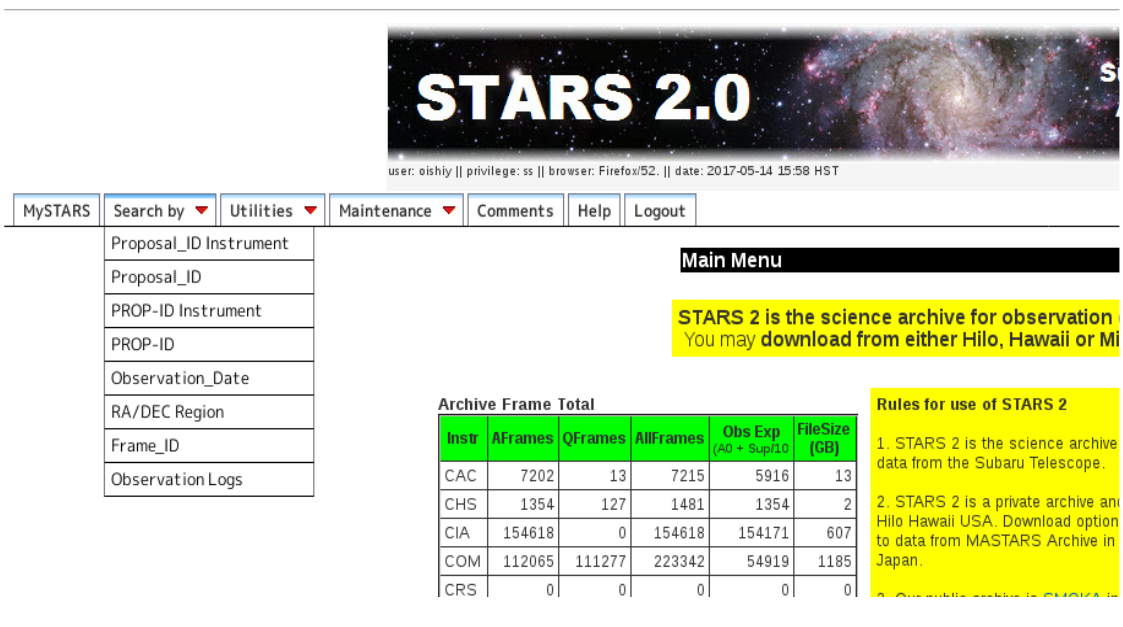
Figure 1:STARS Search by
After selecting your proposal ID, you can find new page (figure 2)
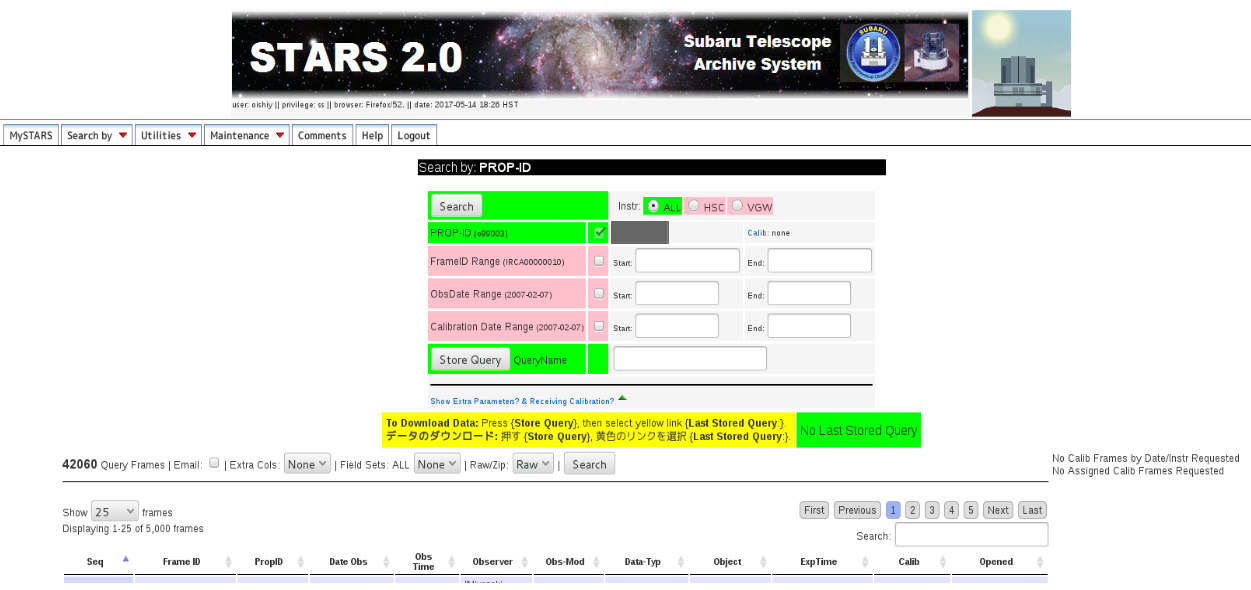
Figure 2:STARS Search
If you need all data belonging to the proposal ID, request the data via Store Query button. If you want to obtain some specific frames, specify the range of data frame in FrameID Range, save with arbitrary name, and click Store Query button.
Then you will receive “STARS2 Stored Query” message by e-mail. Please download the data following its instruction. You can also get a script for data downloading (S2Query.tar) from MySTARS tab. In the tab, choose the QueryName which you saved in previous step and find the page “One Query” (figure 3). S2Query.tar can be downloaded at the bottom of this page.
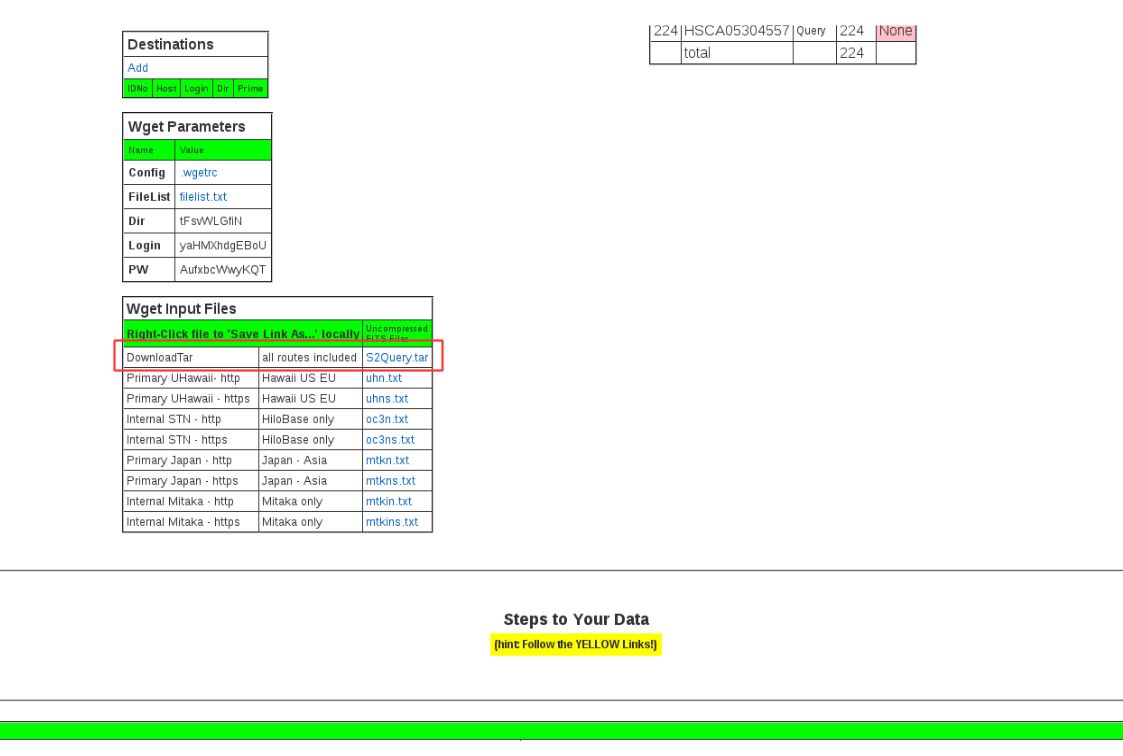
Figure 3:STARS S2Query download
To download your raw data with S2Query.tar, follow the way shown below.
# Create a directory for storing raw data (named “rawdata” in this example).
mkdir ~/rawdata

# Move S2Query.tar to raw data if S2Query.tar is in ~/Downloads
cd rawdata
mv ~/Downloads/S2Query.tar .

# Expanding
tar xvf S2Query.tar

# Execute download script in /zadmin
./zadmin/unpack.py

# After execution, please select appropriate network which you use.
Once your downloading is finished, you can find HSCA*.fits in ~/rawdata directory. Refer to Naming rules of raw data for raw data name.
Prepare directories and setting data
Once you downloaded your data, you need to create a directory for data reduction and setup data. In this section, 1) creating a directory for reduction and _mapper file, 2) setting Brighter-Fatter kernel, 3) creating links to reference catalog, 4) Set up the data of the transmission curve for HSC filters, 5) Y-band Stary Light are described. If you have installed hscpipe using a binary package, you complete those three steps just executing hscpipe/6.7/create-rootdir.sh. When you use HSC data analysis machine for open use (hanaco), you are also available the script installed in hanaco.
# Use create-rootdir.sh
# Assume reference catalog is in ~/astrometry_data/,
# ~/HSC as a directory for reduction and hscPipe package is under ~/opt
~/opt/hscpipe/6.7/create-rootdir.sh ~/HSC ~/astrometry_data/ps1_pv3_3pi_20170110

# On hanaco
/data/ana/hscpipe/6.7/create-rootdir.sh /data/[user]/HSC /data/ana/hscpipe/ps1_pv3_3pi_20170110

# /path/to/hscpipe/version/create-rootdir.sh [directory for reduction] [directory for reference catalog]
# The directory for create-rootdir.sh and the reference catalog in hanaco is fixed.
# ~/HSC/_mapper, link named ps1_pv3_3pi_20170110 in ~/HSC/ref_cats, and link named ~/HSC/CALIB/BFKERNEL/brighter_fatter_kernel.pkl are created.
If you do not use a binary package, you need to set one by one. The detailed ways are described below.
Creating a directory for reduction and _mapper file
_mapper file indicates which equipment is used.
Warning
The reduction dose not proceed without _mapper file.
# Setup environment variables with hscPipe setup command
# You need to do every login.
setup-hscpipe

# Create a directory for reduction (in case of ~/HSC)
mkdir ~/HSC
# Create _mapper file
echo 'lsst.obs.hsc.HscMapper' > ~/HSC/_mapper
Setting Brighter-Fatter kernel
For hscPipe 5 and 6, you need to copy the kernel which removes the brighter-fatter effect (whereby brighter stars are enlarged due to detector physics) under ~/HSC/CALIB. If you execute create-rootdir.sh included in binary package, this step has already been done. If you set the kernel manually, please follow the instruction below.
# Make BFKERNEL directory (you have to name “BFKERNEL”) under ~/HSC/CALIB
mkdir ~/HSC/CALIB/BFKERNEL

# There is brighter_fatter_kernel.pkl in $OBS_SUBARU_DIR/hsc/, so create link to it.
cd ~/HSC/CALIB/BFKERNEL
ln -s $OBS_SUBARU_DIR/hsc/brighter_fatter_kernel.pkl
Creating links to reference catalog for astrometry
In the CCD processing, the astrometric and photometric calibration are performed using reference catalog.
Note
While you need to execute setup astrometry_net_data command at every login for hscPipe4 or earlier, you just need to create a link below only once for hscPipe5 or later.
# Assume that catalog files are under ~/astrometry_data/.
# Create ref_cats directory (the directory name must be "ref_cats"!).
mkdir ~/HSC/ref_cats

# Move to ref_cats, and create link to reference catalog.
cd ~/HSC/ref_cats
ln -s ~/astrometry_data/ps1_pv3_3pi_20170110
Set up the data of the transmission curve for HSC filters
From hscPipe6, you have to set up the data of the transmission curve for HSC filters by yourself. To do this, type:
installTransmissionCurves.py ~/HSC
Y-band stray light
HSC has had some features known as “The Eye of Y” in the y-band images due to LEDs used in the instrument encoders(https://community.lsst.org/t/y-band-stray-light-correction-for-hsc/2517). From hscPipe 6, you need the stray light data to process Y-band images. Make directory ~/HSC/CALIB/STRAY_LIGHT and copy the stray light data from URL:http://tigress-web.princeton.edu/~pprice/strayLight/ in this directory.
Setting a registry for raw data
The raw data downloaded from STARS should be moved to a repository for hscPipe processing and registered. The command of hscPipe “ingestImages.py” is used.
# Move the raw data to a directory for data reduction, create a registry and register the raw data.
# Assume that raw data are in ~/rawdata.
# Specify the directory with absolute path.
ingestImages.py ~/HSC ./rawdata/*.fits --mode=link --create

# ingestImages.py [directory for data reduction] [raw fits file name] --mode=[move,copy,link,skip] --create
# Options are,
#       --mode: Mode of delivering the files to their destination.
                If you choose "link", the link to raw data is created.
#       --create: Create new registry.
The new directories, such as [Object Name], DARK, and DOMEFLAT and a registry registry.sqlite3 are generated under ~/HSC. The structure of these directories should be ~/HSC/[Object Name, BIAS, DARK, DOMEFLAT]/[dateObs]/[opinting]/[filter]/HSCA*.fits.
The contents of registry.sqlite3 can be checked by SQL. If you are interested in SQL, please check other materials.
# Open registry.sqlite3 with SQLite.
sqlite3 registry.sqlite3

# Read header information.
sqlite> .header on
# Display data.
sqlite> SELECT visit, filter, field, count(visit)
...> FROM raw                                        # Select raw table in the registry.
...> GROUP BY visit, filter, field;                  # Order of display, visit > filter > field
# You can write it in one line, "select filter, field, visit, count(visit) from raw group by visit;"

# Results
visit|filter|field|count(visit)
17636|HSC-Z|DOMEFLAT|112
17638|HSC-Z|DOMEFLAT|112
17640|HSC-Z|DOMEFLAT|112
17642|HSC-Z|DOMEFLAT|112
17644|HSC-Z|DOMEFLAT|112
17646|HSC-Z|DOMEFLAT|112
18336|HSC-I|DARK|112
18350|HSC-Y|DARK|112
.....

# Quit
sqlite> .q
Please verify that the number of all “count(visit)” column is 112 which indicates all the 112 CCDs are included in 1 visit. You can also check the registered visit number of each filter and each field.
Warning
The task of hscPipe sometimes proceeds even though some CCD data is lacking. So please check that all visits have 112 CCDs data.